Tater Tot Appetizer Cups Recipe
If you are searching for a crowd-pleasing snack that’s both fun to eat and bursting with flavor, these Tater Tot Appetizer Cups are an absolute gem. Crispy on the outside, tender on the inside, and loaded with gooey cheese, crunchy bacon, and fresh green onions, these little bites make the perfect party treat or cozy night-in indulgence. They’re simple to prepare yet feel special enough to impress any guest, combining familiar comfort favorites in a clever, handheld form that’s just asking to be devoured.
Ingredients You’ll Need
This recipe calls for straightforward ingredients that you probably already have on hand, and each plays a special role in bringing these Tater Tot Appetizer Cups to life. From the crispy tater tots that form the golden base to the creamy and savory toppings, together they create a balance of textures and flavors that delight every bite.
- Frozen tater tots (48-60, 16-oz bag): The essential crispy potato bite that molds into the perfect cup shape once baked.
- Cheddar cheese (3/4 cup, shredded): Adds melty, sharp flavor and a golden, bubbly finish.
- Sour cream (1/2 cup): Brings cool tanginess that contrasts beautifully with the crispy tots and warm cheese.
- Bacon (4 slices, cooked and crumbled): Delivers smoky crunch that elevates the flavor profile to irresistible heights.
- Green onions (2, sliced – green parts only): Offers a fresh, mildly oniony pop of color and brightness to each cup.
How to Make Tater Tot Appetizer Cups
Step 1: Prepare Your Baking Setup
Begin by preheating your oven to 450ºF and spraying your muffin pan cups with cooking spray. This ensures the tater tots won’t stick and helps them crisp up nicely during baking. If you’re using a mini muffin pan, get ready for smaller, bite-sized cups; a regular muffin pan will produce larger portions.
Step 2: Form the Base with Tater Tots
Place 2-3 tater tots in each mini muffin cup or 4-5 in each regular-sized cup, arranging them evenly but without pressing too hard. The tots will fuse together as they bake, creating a sturdy foundation for your appetizer cups.
Step 3: Initial Baking
Pop the muffin pan onto the bottom rack of your oven and bake for 10 minutes. This step starts the cooking process, allowing the tots to begin crisping around the edges.
Step 4: Shape the Cups
Carefully remove the pan, then spray the bottom of a shot glass or a small juice glass with cooking spray—this makes shaping easier. Insert the glass into each muffin cup and gently twist it to press the tater tots against the sides of the pan, forming perfect little potato cups. Return the pan to the oven to bake an additional 15 minutes, or until the cups achieve a deep golden brown color and crispy texture. This shaping step transforms ordinary tots into charming edible vessels!
Step 5: Add Cheese and Finish Baking
Once your cups are golden and crisp, add about a tablespoon of shredded cheddar to each one. Return them to the oven for 4-5 minutes until the cheese melts into glorious, slightly bubbling perfection. After baking, transfer the cups to a platter and let them cool for about 5 minutes—it helps them set up slightly and makes them easier to handle.
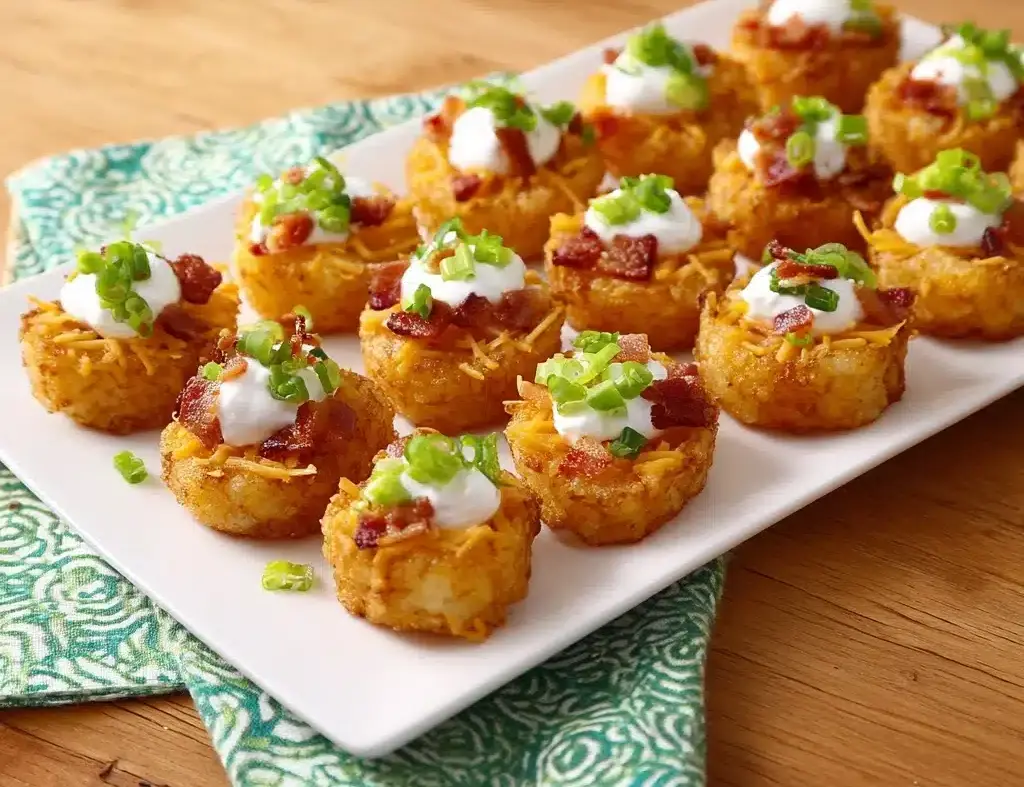
Step 6: Top and Serve
Now for the fun part! Dollop each Tater Tot Appetizer Cup with a bit of sour cream, sprinkle over crispy bacon bits and sliced green onions. Serve them warm to enjoy the fantastic contrast of textures and flavors that will have everyone reaching for seconds.
How to Serve Tater Tot Appetizer Cups

Garnishes
While sour cream, bacon, and green onions are the traditional toppings, feel free to get creative with garnishes like diced tomatoes, a drizzle of spicy sriracha mayo, or even a sprinkle of fresh chives. These additions can add exciting bursts of flavor and color, turning each appetizer cup into a personalized masterpiece.
Side Dishes
Tater Tot Appetizer Cups pair wonderfully with a variety of side dishes. Consider serving them alongside a fresh mixed green salad or tangy coleslaw to balance the richness. For a heartier meal, pair them with barbecue pulled pork or baked chicken wings for an indulgent feast.
Creative Ways to Present
To wow your guests, serve these appetizer cups on a rustic wooden board with colorful dipping sauces arranged around them. You can also present them in individual mini cupcake liners for easy grab-and-go snacking. For festive occasions, arrange them in a circle on a platter and garnish with edible flowers or herbs to brighten the presentation.
Make Ahead and Storage
Storing Leftovers
If you have any leftover Tater Tot Appetizer Cups, place them in an airtight container and store in the refrigerator. They will keep their texture fairly well for up to 2 days, making them perfect for enjoying later as a quick snack or appetizer.
Freezing
You can freeze the baked tater tot cups (before adding cheese and toppings) on a baking sheet lined with parchment paper. Once frozen solid, transfer them to a freezer-safe bag or container for up to 1 month. This way, you’ll have a convenient snack ready for future cravings.
Reheating
Reheat leftovers or frozen cups in a preheated oven at 375ºF for about 10-15 minutes until hot and crispy. Avoid microwaving if you want to retain their delicious crunch. Rewarm with cheese and toppings added fresh after heating to maintain the best texture.
FAQs
Can I make these Tater Tot Appetizer Cups vegetarian?
Absolutely! Simply omit the bacon or substitute it with vegetarian bacon bits or cooked mushrooms for that smoky, savory flavor without the meat.
What size muffin pan should I use?
Both mini and regular-sized muffin pans work well. Mini muffin pans create cute, bite-sized appetizer cups, while regular pans yield larger, more filling portions. Choose based on your serving needs.
Can I prepare these ahead of time for a party?
Yes! You can shape and bake the tater tot cups a day ahead and store them refrigerated. Add cheese and toppings just before serving for maximum freshness.
What other cheeses work well in this recipe?
Sharp cheddar is classic, but you can experiment with Monterey Jack, pepper jack, or even smoked gouda for a different flavor twist that’s equally delicious.
Can I add other toppings inside the cups?
Definitely! You can mix in sautéed vegetables like peppers or mushrooms before baking. Adding some cooked ground beef or chili transforms these into hearty, flavorful bites.
Final Thoughts
Taking simple ingredients and transforming them into delightful, crispy, melty Tater Tot Appetizer Cups is a joy that I cannot recommend enough. They bring together the best textures and flavors in one inviting package, perfect for sharing with friends and family. Whether for a busy weeknight or a festive gathering, these cups are sure to become one of your go-to favorites that everyone will love coming back for more.
PrintTater Tot Appetizer Cups Recipe

These Tater Tot Appetizer Cups are a crispy, cheesy, and savory bite-sized treat perfect for parties or snacking. Made with crispy baked tater tots shaped into cups and loaded with cheddar cheese, crispy bacon, sour cream, and fresh green onions, they’re a crowd-pleasing starter that’s easy to prepare and serve warm.
- Prep Time: 10 minutes
- Cook Time: 34-35 minutes
- Total Time: 45 minutes
- Yield: 24 appetizer cups 1x
- Category: Appetizer
- Method: Baking
- Cuisine: American
- Diet: Low Salt
Ingredients
Base
- 48–60 frozen tater tots (16-oz bag)
Toppings
- 3/4 cup shredded cheddar cheese
- 1/2 cup sour cream
- 4 slices bacon, cooked and crumbled
- 2 green onions, sliced (green part only)
Instructions
- Preheat and prepare muffin pan: Preheat the oven to 450ºF. Spray the muffin pan cups thoroughly with cooking spray to prevent sticking.
- Fill muffin cups with tater tots: For mini muffin pans, place 2-3 frozen tater tots in each cup. For regular-sized muffin pans, place 4-5 tots per cup. This forms the base for your appetizer cups.
- Bake initial layer: Place the prepared muffin pan on the bottom rack of the oven and bake for 10 minutes. Then remove the pan carefully from the oven.
- Shape tater tots into cups: Spray the bottom of a shot glass or small juice glass with cooking spray. Insert the glass into each muffin tin opening and twist until the tater tots are pressed up the sides, creating a cup shape with edges near the top of the muffin cup. This ensures the potato cups hold their form when baked further.
- Bake the tater tot cups: Return the muffin pan to the oven and bake for an additional 15 minutes or until the tater tot cups are deep golden brown and crispy.
- Add cheese and melt: Spoon about 1 tablespoon of shredded cheddar cheese into each prepared tater tot cup. Bake for another 4-5 minutes until the cheese is melted and bubbly.
- Cool and top: Remove the cups from the oven and transfer them to a serving platter. Let them cool for 5 minutes to set.
- Garnish and serve: Top each cup with a dollop of sour cream, crumbled bacon, and sliced green onions. Serve the appetizer cups warm for best taste and texture.
Notes
- You can prepare these in advance and reheat before serving.
- For a vegetarian version, omit bacon or substitute with vegetarian bacon bits.
- Use extra sharp cheddar for a more intense cheese flavor.
- If you don’t have a shot glass, a small metal or silicone spatula handle can help shape the cups.
- Adjust baking times slightly depending on your oven’s heat and muffin pan size.
Nutrition
- Serving Size: 2 appetizer cups
- Calories: 220
- Sugar: 1g
- Sodium: 380mg
- Fat: 13g
- Saturated Fat: 5g
- Unsaturated Fat: 6g
- Trans Fat: 0.2g
- Carbohydrates: 18g
- Fiber: 2g
- Protein: 6g
- Cholesterol: 25mg
Keywords: tater tot cups, appetizer, party snack, cheesy tater tots, bacon appetizer, finger food