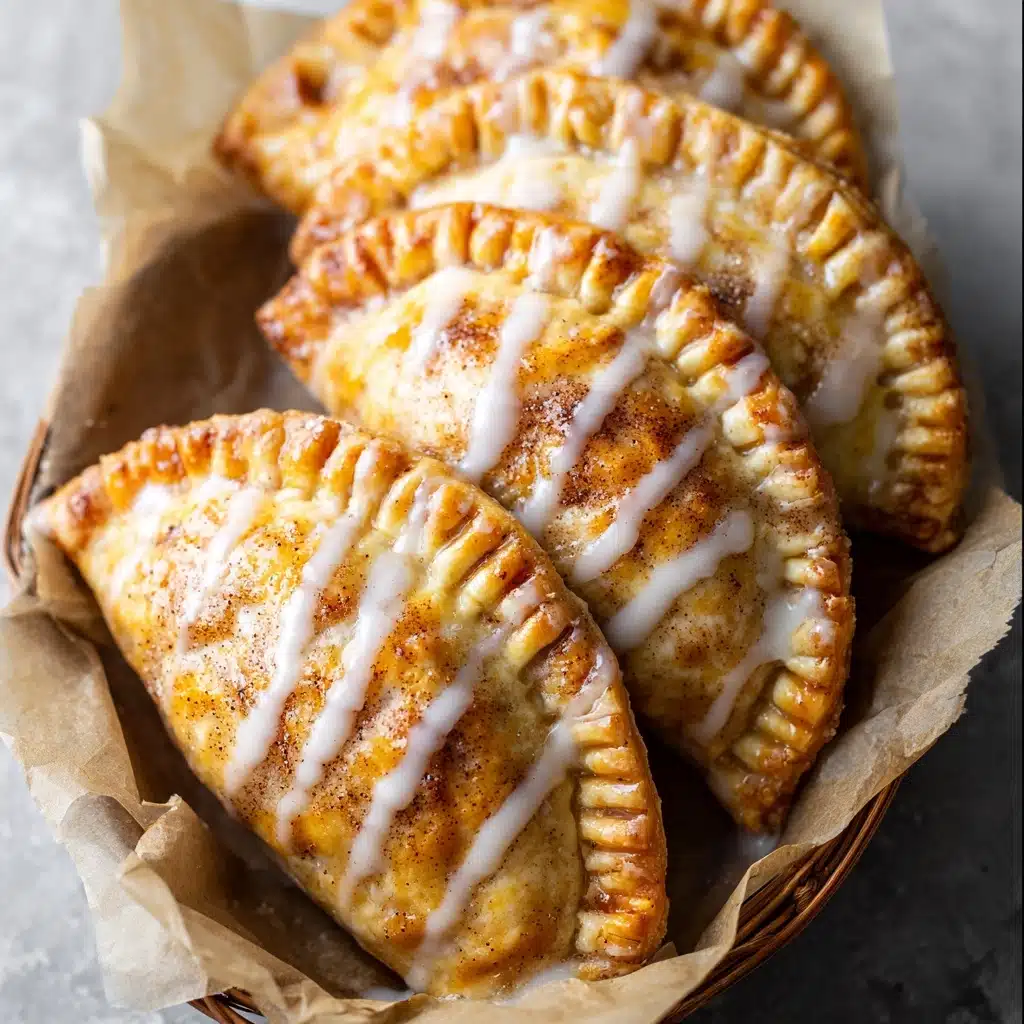
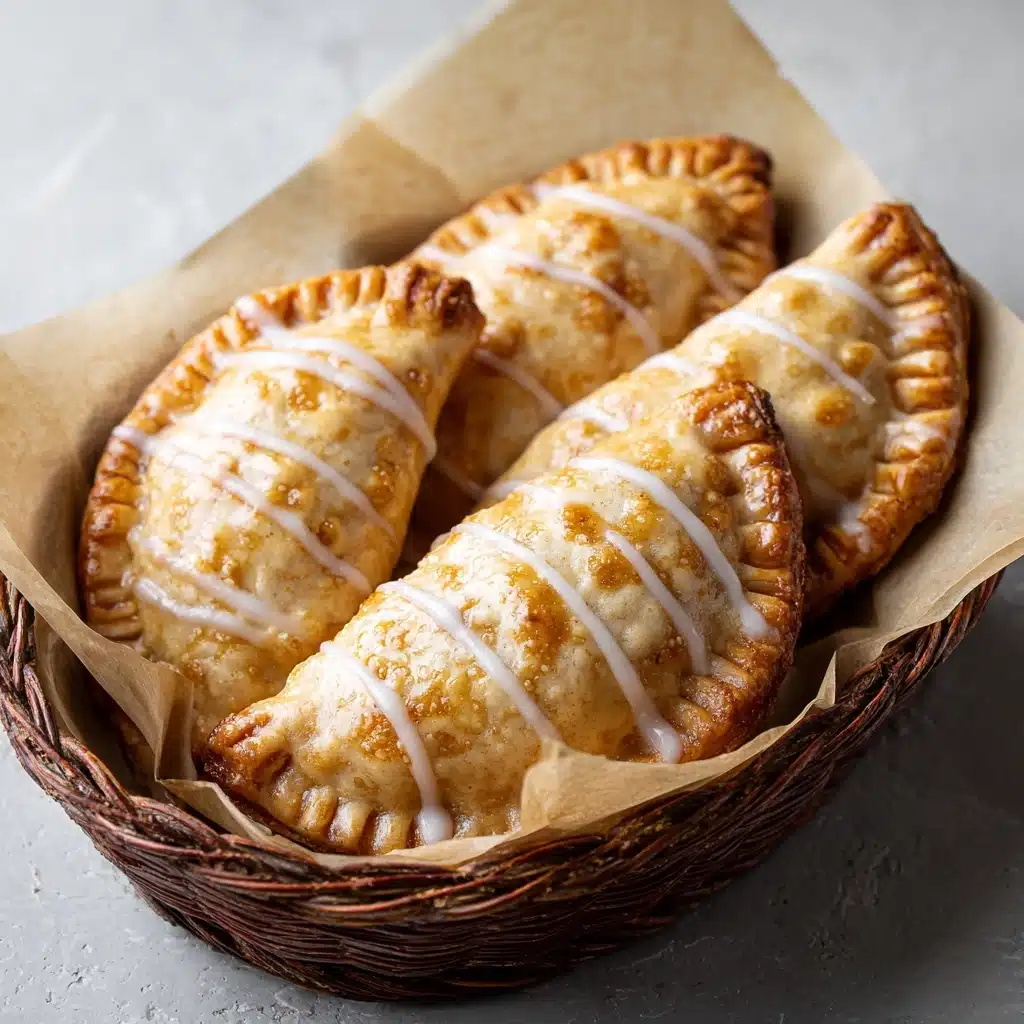
Brown Sugar Pear Hand Pies Recipe
If you have a soft spot for desserts that feel like a warm hug, Brown Sugar Pear Hand Pies are about to become your new favorite treat. These delightful little parcels combine the natural sweetness of ripe pears with the rich, caramel-like depth of brown sugar, all wrapped in a buttery, flaky crust. Perfectly portioned for enjoying on the go or sharing with loved ones, these hand pies bring a cozy twist to classic fruit pastries, making every bite a burst of comforting flavor and texture.
Ingredients You’ll Need
These Brown Sugar Pear Hand Pies come together with a handful of simple, thoughtfully chosen ingredients. Each component plays an essential role, from the juicy pears offering tender fruitiness to the brown sugar adding caramel warmth and complexity. The all-purpose flour and cold butter create that irresistible flaky crust, while a touch of cinnamon and lemon juice give a balanced depth of flavor and brightness.
- Ripe pears: The star of the filling, peeled and diced for tender, juicy bites.
- Brown sugar: Adds rich sweetness and a subtle molasses flavor that complements the pears beautifully.
- Butter (for filling and dough): Brings a luscious richness and helps create the flaky texture in the crust.
- Cinnamon: A warming spice that enhances the fruit’s natural sweetness.
- Lemon juice: Balances sweetness with a bright, tangy note to keep the filling lively.
- Cornstarch: Thickens the pear filling to a perfect consistency without weighing it down.
- All-purpose flour: The base of the dough, providing structure and tenderness.
- Sugar (for dough): A little sweetness in the crust enhances flavor and browning.
- Salt: Essential for boosting flavors and balancing sweetness.
- Cold unsalted butter (for dough): Cubed and chilled, this is key to the flaky, layered crust.
- Ice water: Helps bind the dough without melting the butter, keeping it perfectly flaky.
- Powdered sugar: Used in the glaze to add a smooth, sweet finish.
- Milk: Adds creaminess to the glaze for a silky texture.
- Vanilla bean paste or extract: Infuses the glaze with warm, fragrant notes.
- Optional egg wash: Mix of egg and water for a beautifully golden, shiny crust.
How to Make Brown Sugar Pear Hand Pies
Step 1: Prepare the Pear Filling
Start by combining the diced pears, brown sugar, butter, cinnamon, lemon juice, and cornstarch in a saucepan over medium heat. Stir continuously until the mixture bubbles and thickens to a luscious filling consistency. This simmering step intensifies flavors and ensures the filling will hold together nicely inside the pies. Once thickened, set it aside to cool completely — this prevents the dough from becoming soggy when assembling.
Step 2: Make the Flaky Dough
In a food processor or using a pastry cutter, pulse the all-purpose flour, sugar, and salt together until blended. Cut in the chilled, cubed butter until the mixture resembles pea-sized crumbs — this is crucial for that flaky, tender crust everyone loves. Gradually add ice water, just enough so the dough holds together when pinched. Avoid overworking it to keep the dough from becoming tough. Form the dough into a disk, wrap it, and chill it for at least one hour to rest and firm up the butter.
Step 3: Assemble the Hand Pies
On a lightly floured surface, roll out the dough to about 1/8-inch thickness. Use a 4-inch round or rectangle cutter to make the pie shapes. Spoon a generous amount of the cooled pear filling onto one half of each dough piece, leaving a small border to seal edges. Fold the dough over the filling, and press the edges firmly with a fork to seal completely. This step locks in all the delicious flavors and ensures none escapes during baking.
Step 4: Bake to Golden Perfection
Place the assembled hand pies on a baking sheet lined with parchment paper. For a glossy, golden brown finish, brush the tops with egg wash if you’re using it. Bake at 375°F (190°C) for 20 to 25 minutes, or until the crust is beautifully golden and crisp. The smell alone will have you eager to try your freshly baked Brown Sugar Pear Hand Pies as soon as they come out of the oven.
Step 5: Add the Vanilla Glaze
While the pies cool slightly, whisk together powdered sugar, milk, and vanilla bean paste to make a smooth glaze. Drizzle this over the warm pies for a lovely, sweet finish that adds a hint of floral vanilla flavor. This glaze not only enhances their appearance but also balances the deep caramel sweetness of the filling perfectly.
How to Serve Brown Sugar Pear Hand Pies
Garnishes
A light dusting of powdered sugar or a sprinkle of finely chopped toasted pecans can elevate the look and texture of your Brown Sugar Pear Hand Pies. Fresh mint leaves or a few extra cinnamon sprinkles on top add a fresh aroma, giving your presentation a thoughtful, elegant touch that guests will appreciate.
Side Dishes
These hand pies shine alongside a scoop of vanilla bean ice cream or a dollop of freshly whipped cream. For a truly cozy experience, serve them with a warm cup of spiced chai or your favorite black tea to complement the natural pear sweetness and brown sugar notes.
Creative Ways to Present
Try stacking a few Brown Sugar Pear Hand Pies on a rustic wooden board dotted with edible flowers for a charming autumnal dessert spread. Alternatively, serve them in individual pastry boxes for a delightful homemade gift or a fun picnic treat that’s both portable and irresistibly delicious.
Make Ahead and Storage
Storing Leftovers
If you have any Brown Sugar Pear Hand Pies left (though that’s rare!), store them in an airtight container at room temperature for up to two days. This keeps the crust crisp and the filling fresh, so you can enjoy every bit of their deliciousness even the next day.
Freezing
To save Brown Sugar Pear Hand Pies for longer, freeze them before baking by assembling and freezing on a lined tray, then transferring them into a freezer-safe bag once solid. Bake from frozen, adding a few extra minutes to the baking time as needed. This way, you can have homemade pies ready to go for whenever the craving hits.
Reheating
Warm leftover hand pies gently in a preheated oven at 325°F (160°C) for about 10 minutes to revive that golden crust and cozy filling. Avoid microwaving if possible, as it can make the crust soggy. This reheating method restores their fresh-from-the-oven charm beautifully.
FAQs
Can I use other fruits instead of pears?
Absolutely! Apples, peaches, or plums make excellent substitutes. Just adjust the cinnamon and lemon juice slightly to complement the fruit’s natural flavors, and make sure the filling is thickened properly to avoid soggy pies.
Do I have to use brown sugar in the filling?
Brown sugar provides that rich, caramel undertone, but you can substitute with granulated sugar if needed. Keep in mind, the flavor will be a bit lighter without the molasses notes brown sugar imparts.
Is it necessary to chill the dough?
Yes, chilling helps solidify the butter, which is key to achieving the signature flaky texture in your hand pies. It also makes the dough easier to roll and shape without sticking.
Can I make these pies vegan?
With a few swaps, yes! Use a plant-based butter alternative and replace the egg wash with a little almond milk or aquafaba for brushing. For the glaze, substitute milk with a dairy-free option and use a vegan vanilla extract.
How do I know when the pies are done?
The crust should be golden brown and crisp to the touch. You’ll also notice a fragrant aroma as the filling bubbles inside. If they’re still pale, give them a few more minutes in the oven, watching carefully to avoid burning.
Final Thoughts
There’s something truly special about Brown Sugar Pear Hand Pies that makes every bite feel like a cozy moment made just for you. Whether you’re baking for family, gifting a homemade treat, or simply craving a sweet escape, these hand pies deliver comfort and flavor in perfect harmony. I can’t wait for you to try them — baking these pies is such a joyful experience, and the taste will have you coming back for more.
PrintBrown Sugar Pear Hand Pies Recipe

These Brown Sugar Pear Hand Pies are a delightful and easy-to-make dessert featuring tender, caramelized pears wrapped in a flaky buttery crust. The natural sweetness of ripe pears combined with brown sugar and warm cinnamon creates a comforting filling, perfectly complemented by a delicate vanilla glaze on top. Ideal for a cozy snack or an elegant treat, these hand pies offer a delicious balance of sweet and spice with a crisp finish.
- Prep Time: 20 minutes
- Cook Time: 25 minutes
- Total Time: 1 hour 45 minutes
- Yield: 8 hand pies 1x
- Category: Dessert
- Method: Baking
- Cuisine: American
- Diet: Vegetarian
Ingredients
Filling
- 2 ripe pears, peeled and diced
- ⅓ cup brown sugar
- 1 tbsp butter
- ½ tsp cinnamon
- 1 tsp lemon juice
- 1 tbsp cornstarch
Dough
- 2 ½ cups all-purpose flour
- 1 tbsp sugar
- 1 tsp salt
- 1 cup cold unsalted butter, cubed
- 6–8 tbsp ice water
Glaze
- 1 cup powdered sugar
- 1 tbsp milk
- 1 tsp vanilla bean paste (or extract)
Optional
- Egg wash (1 egg + 1 tbsp water) for brushing
Instructions
- Prepare the filling: In a medium saucepan over medium heat, combine the diced pears, brown sugar, butter, cinnamon, lemon juice, and cornstarch. Cook while stirring occasionally until the mixture becomes bubbly and thickened, about 5–7 minutes. Remove from heat and allow it to cool completely to prevent melting the dough later.
- Make the dough: In a food processor, pulse the all-purpose flour, sugar, and salt until combined. Add the cold, cubed unsalted butter and pulse until the mixture resembles pea-sized crumbs. Gradually add 6 to 8 tablespoons of ice water, pulsing until the dough starts to hold together when pressed. Form the dough into a disc, wrap in plastic wrap, and chill in the refrigerator for at least 1 hour to firm up.
- Roll and cut the dough: On a lightly floured surface, roll out the chilled dough to about ¼ inch thickness. Cut into 4-inch circles or rectangles, depending on your preferred hand pie shape. Place a spoonful of the cooled pear filling on one half of each dough piece.
- Seal and shape the pies: Fold the dough over the filling to create a half-moon or rectangular shape. Press the edges together firmly, then crimp with a fork to seal completely and prevent filling from leaking during baking. If desired, brush the tops with prepared egg wash for a golden finish.
- Bake the hand pies: Preheat your oven to 375°F (190°C). Place the prepared hand pies on a parchment-lined baking sheet and bake for 20 to 25 minutes, or until the crust is golden brown and crisp.
- Add the glaze: While the pies bake, whisk together the powdered sugar, milk, and vanilla bean paste until smooth. Once the pies have cooled slightly after baking, drizzle the vanilla glaze over the top for a sweet finishing touch.
Notes
- If you do not have vanilla bean paste, pure vanilla extract can be used as a substitute in the glaze.
- Ensure the filling is completely cooled before adding to dough to prevent sogginess.
- You can omit the egg wash if you prefer a more rustic look; the pies will still bake beautifully but with a matte finish.
- These pies can be frozen before baking; place them on a baking sheet and freeze, then transfer to a freezer bag for up to one month. Bake from frozen, adding a few extra minutes to the baking time.
- Adjust sweetness by reducing brown sugar or glaze sugar if you prefer a less sweet dessert.
Nutrition
- Serving Size: 1 hand pie
- Calories: 280
- Sugar: 15g
- Sodium: 180mg
- Fat: 15g
- Saturated Fat: 9g
- Unsaturated Fat: 5g
- Trans Fat: 0g
- Carbohydrates: 32g
- Fiber: 2g
- Protein: 3g
- Cholesterol: 25mg
Keywords: pear hand pies, brown sugar dessert, flaky pie crust, autumn dessert, cinnamon pears, handheld pies