Toasted Coconut Mocha Popsicles Recipe
Introduction
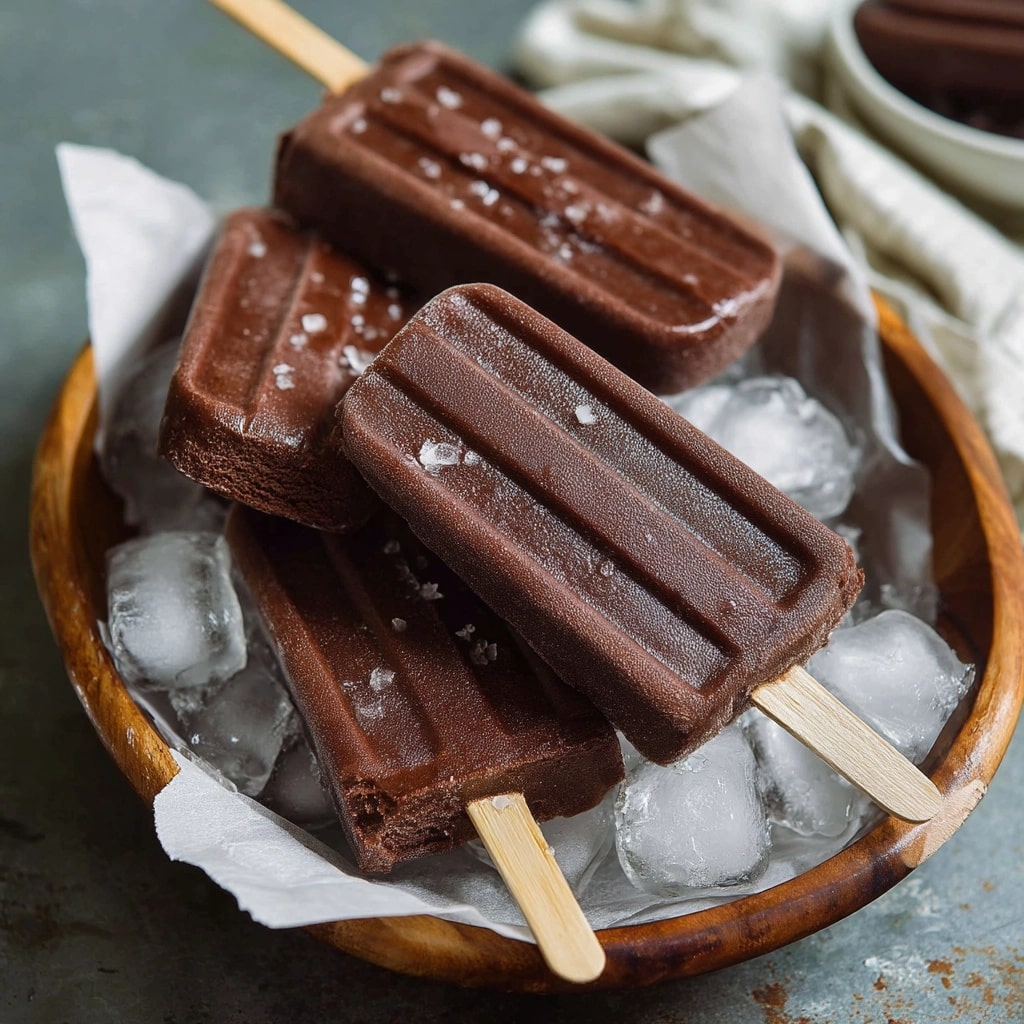
These Toasted Coconut Mocha Popsicles are a refreshing and indulgent treat perfect for warm days. Combining rich cold brew coffee, creamy coconut milk, and a touch of cocoa, they offer a delicious twist on your favorite mocha flavors.
Ingredients
- 1 cup cold brew coffee
- 1 cup coconut milk
- 2 tablespoons cocoa powder
- 2 tablespoons sweetener (such as honey, maple syrup, or sugar)
Instructions
- Step 1: In a bowl, whisk together the cold brew coffee, coconut milk, cocoa powder, and sweetener until smooth and well combined.
- Step 2: Pour the mixture evenly into popsicle molds, then place them in the freezer for at least 4 hours or until fully frozen.
- Step 3: To unmold, run warm water over the outside of the molds for a few seconds, then gently pull out the popsicles.
Tips & Variations
- For extra flavor, lightly toast shredded coconut and sprinkle it inside the molds before filling with the mixture.
- Adjust the sweetness to your preference by adding more or less sweetener.
- Use almond or oat milk as an alternative to coconut milk if desired.
Storage
Store the popsicles in the freezer in an airtight container or wrapped individually in plastic wrap. They will keep best for up to 2 weeks. When ready to enjoy, simply remove from the freezer and let sit for a couple of minutes for easier removal from the molds.
How to Serve
Serve this delicious recipe with your favorite sides.
FAQs
Can I use regular brewed coffee instead of cold brew?
Yes, you can use regular brewed coffee. Just make sure it is fully cooled before mixing with the other ingredients to prevent melting the popsicles.
What sweeteners work best for this recipe?
Honey, maple syrup, agave, or regular sugar all work well. Choose your preferred sweetener and adjust the amount to suit your taste.
PrintToasted Coconut Mocha Popsicles Recipe
These Toasted Coconut Mocha Popsicles combine the rich flavors of cold brew coffee, coconut milk, and cocoa powder to create a refreshing and indulgent frozen treat. Perfect for coffee lovers looking for a cool, dairy-free dessert with a hint of chocolate and tropical coconut.
- Prep Time: 10 minutes
- Cook Time: 0 minutes
- Total Time: 6 hours 10 minutes
- Yield: 6 popsicles 1x
- Category: Dessert
- Method: Freezing
- Cuisine: American
- Diet: Vegan
Ingredients
Ingredients
- 2 cups cold brew coffee
- 1 cup coconut milk
- 2 tablespoons unsweetened cocoa powder
- 2–3 tablespoons sweetener (such as maple syrup, agave, or sugar), adjust to taste
- Optional: 1/4 cup toasted shredded coconut for garnish or mixing
Instructions
- Prepare the Mixture: In a large bowl, whisk together the cold brew coffee, coconut milk, cocoa powder, and sweetener until smooth and fully combined. Adjust sweetness as needed.
- Pour into Molds: Carefully pour the mixture into popsicle molds, leaving a small gap at the top to allow for expansion during freezing.
- Freeze: Insert popsicle sticks and place the molds in the freezer. Freeze for at least 6 hours, or until completely solid.
- Serve: To unmold, run warm water over the outside of the popsicle molds for a few seconds to loosen, then gently pull the popsicles out. Optionally, sprinkle with toasted shredded coconut before serving for extra texture and flavor.
Notes
- Use full-fat or light coconut milk depending on your desired richness.
- Adjust the cocoa powder and sweetener to taste for a stronger mocha flavor or sweeter popsicles.
- For a creamier texture, blend all ingredients before pouring into molds.
- Can substitute cold brew coffee with strong brewed coffee cooled to room temperature.
- Store popsicles in an airtight container or freezer bag to prevent freezer burn.
Keywords: toasted coconut mocha popsicles, cold brew coffee popsicles, dairy-free frozen dessert, vegan mocha popsicles, summer coffee treat