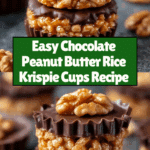
Chocolate Peanut Butter Rice Krispie Cups Recipe
If you have a soft spot for sweet, crunchy treats that combine the best of two beloved flavors, then these Chocolate Peanut Butter Rice Krispie Cups are about to become your new obsession. Imagine the perfect harmony of crispy Rice Krispies coated in luscious peanut butter and marshmallows, topped with a rich, glossy layer of chocolate that melts in your mouth. This easy-to-make dessert not only delivers on nostalgia but adds a sophisticated twist with a sprinkle of sea salt that elevates every bite. Whether you’re making them for a party, a snack, or just because, these Chocolate Peanut Butter Rice Krispie Cups promise to bring smiles with their irresistible flavor and texture.
Ingredients You’ll Need
These ingredients are simple pantry staples that come together beautifully to create a delicious treat that balances sweet, salty, and crunchy elements. Each ingredient plays a special role, from the creamy peanut butter binding everything to the chocolate topping adding that final touch of decadence.
- 3 cups Rice Krispies cereal: The star crunchy component providing the classic crispy texture you love in every bite.
- 1 cup creamy peanut butter: Adds rich, nutty flavor and helps hold the mixture together.
- 1/2 cup unsalted butter: Melts smoothly into the marshmallows to create a luscious base without extra saltiness.
- 1 cup mini marshmallows: Gives sweetness and that gooey texture essential for binding the cereal.
- 1 cup chocolate chips: The crowning glory that forms a silky chocolate layer on top.
- 1/2 tsp vanilla extract (optional): Adds depth and enhances the sweetness naturally.
- Pinch of sea salt (optional): Balances the sweetness with a subtle saltiness that highlights flavors.
How to Make Chocolate Peanut Butter Rice Krispie Cups
Step 1: Melt the Base
Start by gently melting unsalted butter and mini marshmallows over low heat in a medium saucepan. Stir consistently to ensure everything melts evenly into a smooth, glossy mixture. This step creates the sticky, flavorful base that will hold your Rice Krispies together just right.
Step 2: Add Peanut Butter
Once you have a smooth marshmallow-butter blend, stir in the creamy peanut butter and vanilla extract if using. Keep stirring until the mixture is fully combined and velvety smooth. This step infuses the base with that irresistible peanut butter richness.
Step 3: Mix with Cereal
Pour the Rice Krispies cereal into a large bowl, then add the peanut butter mixture. Gently fold the cereal in so that every crunchy piece gets an even coat without crushing the delicate texture. This ensures each bite is perfectly balanced between crispy and gooey.
Step 4: Shape the Cups
Line a muffin tin with paper liners for easy serving and cleanup. Spoon the cereal mixture evenly into each cup, pressing gently with the back of your spoon or fingers to create a flat, compact surface. Don’t press too hard—you want to keep some airiness!
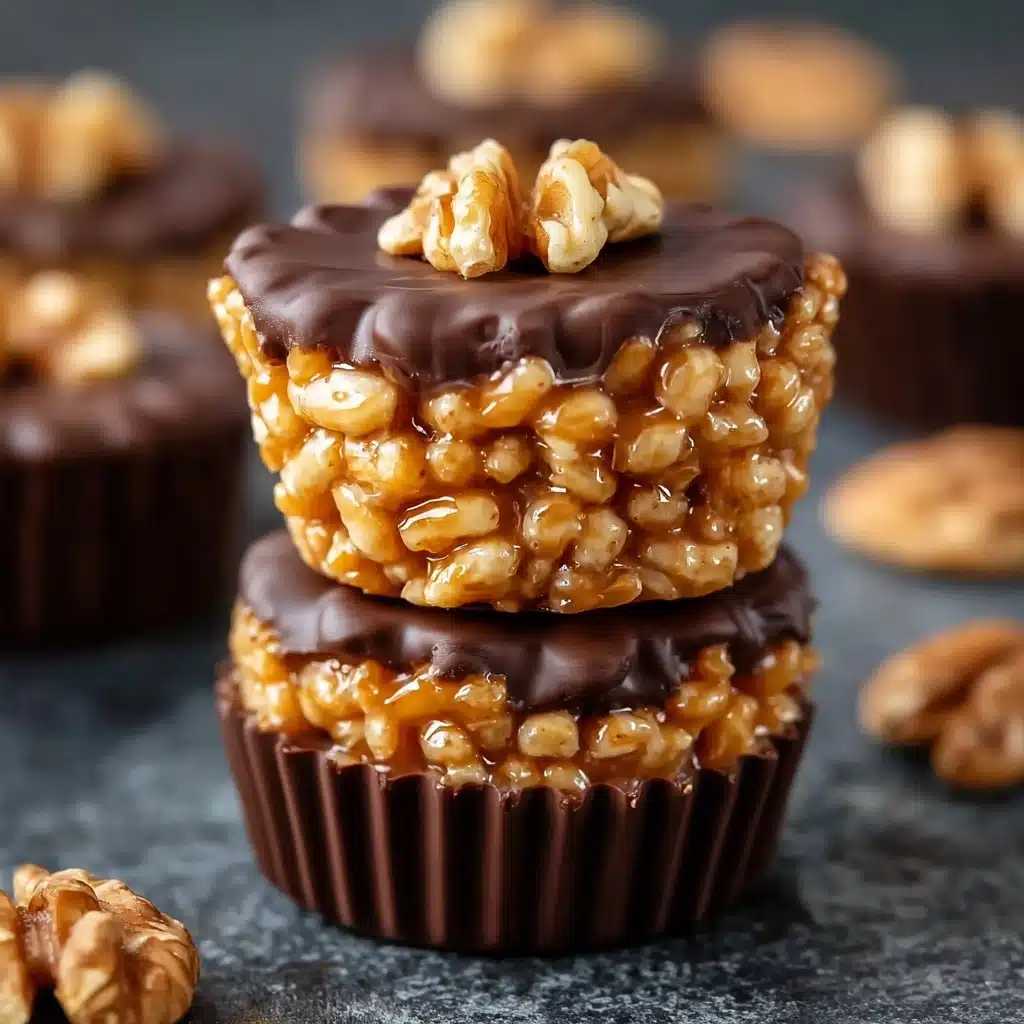
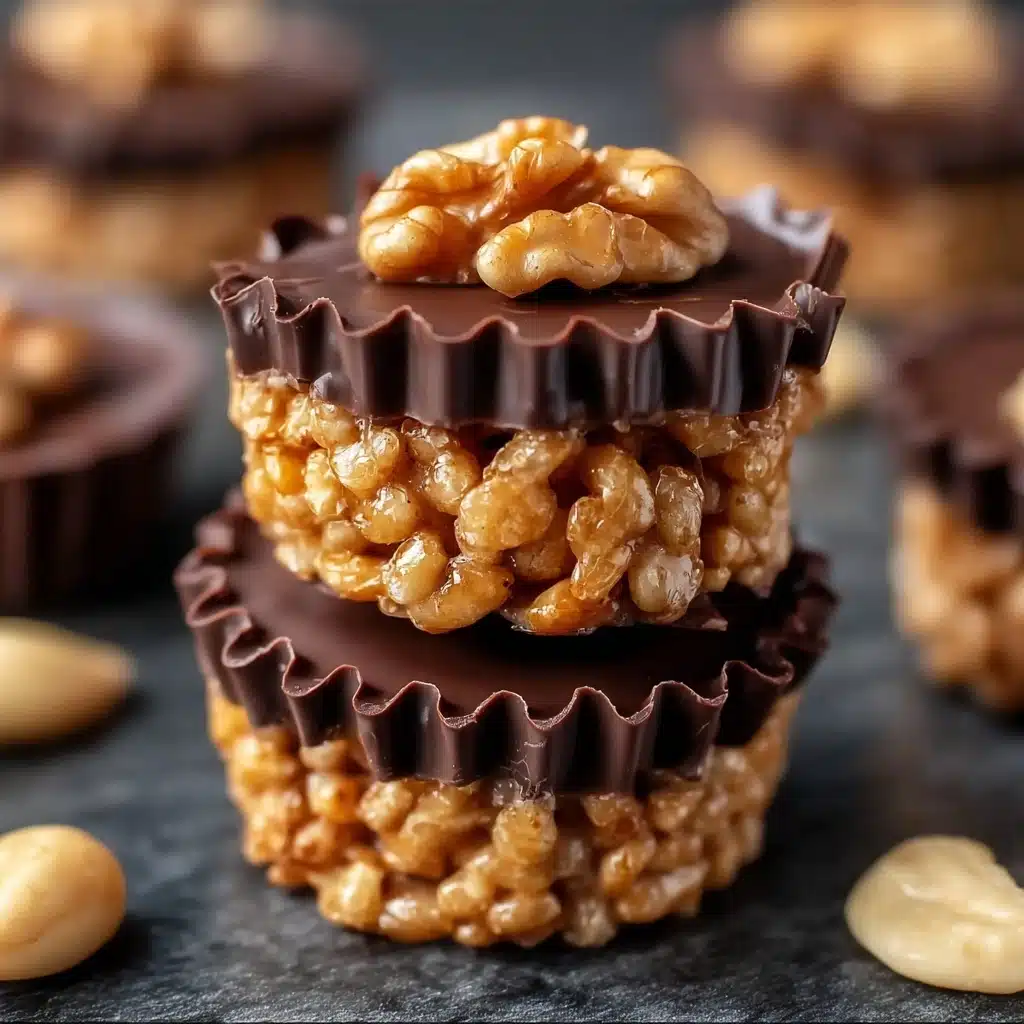
Step 5: Add Chocolate Layer
Melt the chocolate chips in the microwave in 20-second bursts, stirring between each interval until silky and smooth. Spoon this over each Rice Krispie cup, spreading it evenly for a glossy finish. For a gourmet touch, sprinkle a pinch of sea salt on top to bring out the sweetness and add complexity.
Step 6: Set & Serve
Let the cups sit at room temperature for about 20 minutes to allow the chocolate to firm up. If you’re short on time, pop them in the refrigerator to set faster. Once firm, gently peel away the paper liners and enjoy these delightful Chocolate Peanut Butter Rice Krispie Cups either right away or store them for later snacking.
How to Serve Chocolate Peanut Butter Rice Krispie Cups
Garnishes
Although these cups are incredible on their own, a little garnish can turn them into show-stopping treats. Consider sprinkling chopped peanuts for extra crunch, drizzling some caramel for a sticky surprise, or adding a few colorful sprinkles to make them festive and fun.
Side Dishes
These cups make a lovely pairing with a chilled glass of milk, a rich cup of coffee, or even a fruity smoothie which adds freshness and balances the rich peanut butter and chocolate flavors. They also shine alongside simple ice cream for a nostalgic dessert plate.
Creative Ways to Present
To wow guests, serve the Chocolate Peanut Butter Rice Krispie Cups on a pretty platter with parchment paper liners or small cupcake wrappers. You can also stack them up in a cute tower or add little flags for parties. Personalizing each with a drizzle of white chocolate or edible glitter adds an extra touch of charm.
Make Ahead and Storage
Storing Leftovers
Leftover Chocolate Peanut Butter Rice Krispie Cups can be stored in an airtight container at room temperature for up to 3 days. Keep them away from direct sunlight and heat to maintain their perfect texture and glossy chocolate top.
Freezing
These cups freeze beautifully, allowing you to prepare a batch in advance. Wrap each cup individually in plastic wrap, then place them in a freezer-safe container or bag. Frozen cups will keep well for up to 1 month. Just thaw at room temperature before enjoying.
Reheating
Since these treats are meant to be enjoyed at room temperature, reheating isn’t necessary. If you prefer a softer texture, let frozen cups thaw naturally. Avoid microwaving as it might melt the chocolate topping and make the texture less crisp.
FAQs
Can I use crunchy peanut butter instead of creamy?
Absolutely! Crunchy peanut butter adds extra texture that pairs nicely with the crispy cereal, but keep in mind the mixture might be a little less smooth to fold in.
What can I substitute for Rice Krispies cereal?
If you want to try something different, puffed rice or even cornflakes can work well, but Rice Krispies remain the ideal choice for their classic crunch and lightness.
Can I make these vegan or dairy-free?
Yes! Use vegan butter and dairy-free chocolate chips, and double-check that your marshmallows are gelatin-free. This swap keeps the recipe friendly for plant-based diets without losing flavor.
How long does it take to set up completely?
Typically, letting the cups rest at room temperature for 20 minutes is enough for the chocolate to firm up. Refrigeration speeds it up to about 10 minutes if you’re in a hurry.
Is it better to use mini marshmallows or regular-sized?
Mini marshmallows melt faster and blend more evenly into the butter, making them the best option. Regular marshmallows can be used but may take longer to melt and require more stirring.
Final Thoughts
Making Chocolate Peanut Butter Rice Krispie Cups is a joyous experience that rewards you with a tasty treat capturing every bit of childhood charm alongside grown-up flavor sophistication. They’re simple to make, endlessly shareable, and guaranteed to brighten up your snack time or dessert spread. Next time you’re craving something sweet and crunchy, I highly encourage you to whip up a batch – your taste buds will thank you!
PrintChocolate Peanut Butter Rice Krispie Cups Recipe

Delicious and easy-to-make Chocolate Peanut Butter Rice Krispie Cups combining the crunch of Rice Krispies with creamy peanut butter, smooth marshmallows, and a rich chocolate topping. Perfect for a quick dessert or snack that delights both kids and adults.
- Prep Time: 10 minutes
- Cook Time: 10 minutes
- Total Time: 20 minutes
- Yield: 12 cups 1x
- Category: Dessert
- Method: No Bake
- Cuisine: American
- Diet: Vegetarian
Ingredients
Base
- 3 cups Rice Krispies cereal
- 1 cup creamy peanut butter
- 1/2 cup unsalted butter
- 1 cup mini marshmallows
- 1/2 tsp vanilla extract (optional)
- Pinch of sea salt (optional)
Topping
- 1 cup chocolate chips
- Pinch of sea salt (optional, for sprinkling)
Instructions
- Melt the Base: In a medium saucepan over low heat, melt the unsalted butter and mini marshmallows together, stirring consistently until the mixture is smooth and creamy.
- Add Peanut Butter: Stir in the creamy peanut butter and vanilla extract (if using) into the melted mixture until fully combined and smooth.
- Mix with Cereal: Place the Rice Krispies cereal into a large mixing bowl and gently fold in the peanut butter mixture until all the cereal is evenly coated without crushing it.
- Shape the Cups: Line a muffin tin with paper liners. Spoon the cereal mixture evenly into each liner, pressing down gently with the back of a spoon to create a flat, compact surface.
- Add Chocolate Layer: Melt the chocolate chips in the microwave in 20-second intervals, stirring between each interval until smooth. Spoon the melted chocolate evenly over each Rice Krispie cup and spread it to cover the surface. If desired, sprinkle a pinch of sea salt on top for a salty-sweet flavor contrast.
- Set & Serve: Allow the cups to cool at room temperature for about 20 minutes or place them in the refrigerator for faster setting. Once firm, peel off the paper liners and enjoy your Chocolate Peanut Butter Rice Krispie Cups!
Notes
- For a nut-free version, substitute peanut butter with sunflower seed butter.
- Use gluten-free Rice Krispies cereal to make the recipe gluten-free.
- Store the cups in an airtight container at room temperature for up to 3 days or refrigerate for up to a week.
- Microwave chocolate carefully to avoid burning; stir well between intervals.
- To make the cups more festive, add sprinkles or chopped peanuts on top of the chocolate layer before it sets.
Nutrition
- Serving Size: 1 cup (approx. 40g)
- Calories: 210 kcal
- Sugar: 14 g
- Sodium: 85 mg
- Fat: 11 g
- Saturated Fat: 5 g
- Unsaturated Fat: 5 g
- Trans Fat: 0 g
- Carbohydrates: 24 g
- Fiber: 1 g
- Protein: 4 g
- Cholesterol: 15 mg
Keywords: Chocolate, Peanut Butter, Rice Krispie Treats, No Bake, Easy Dessert, Snack, Party Treat