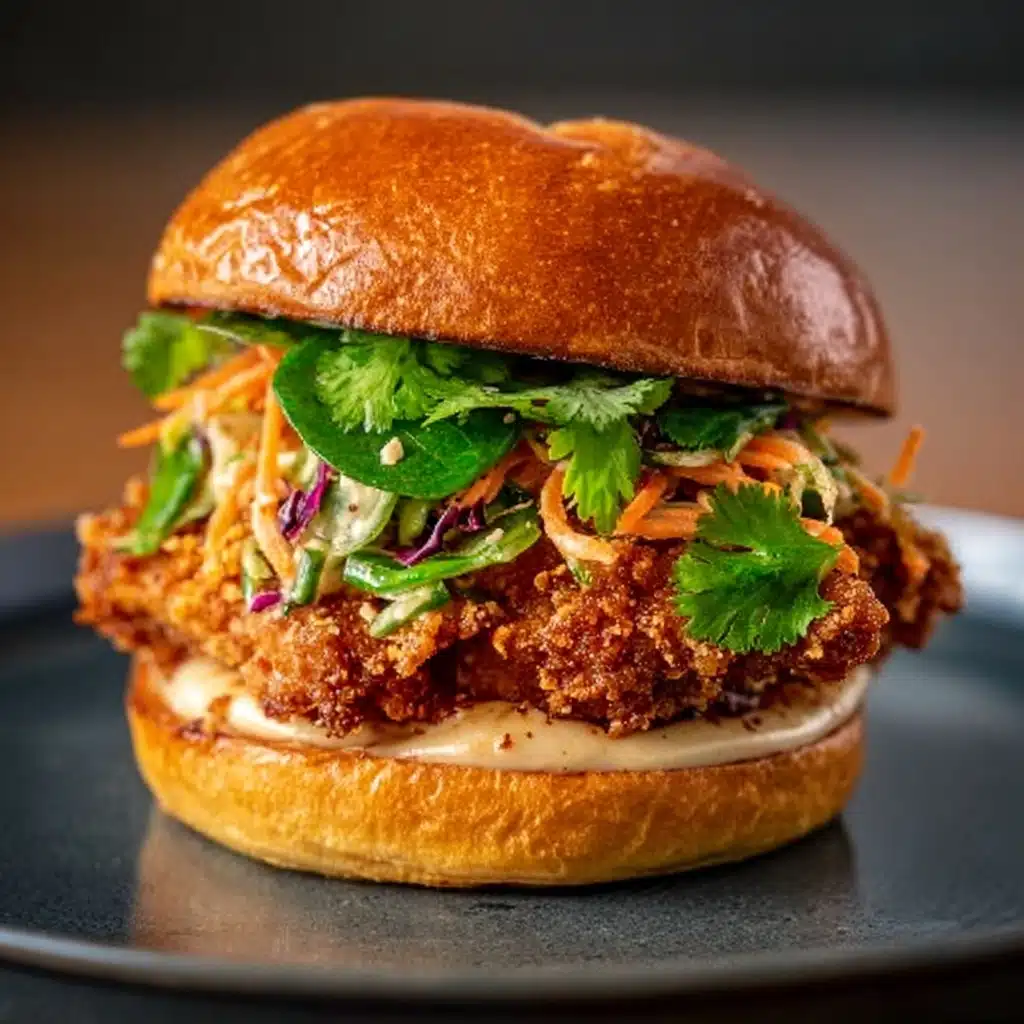
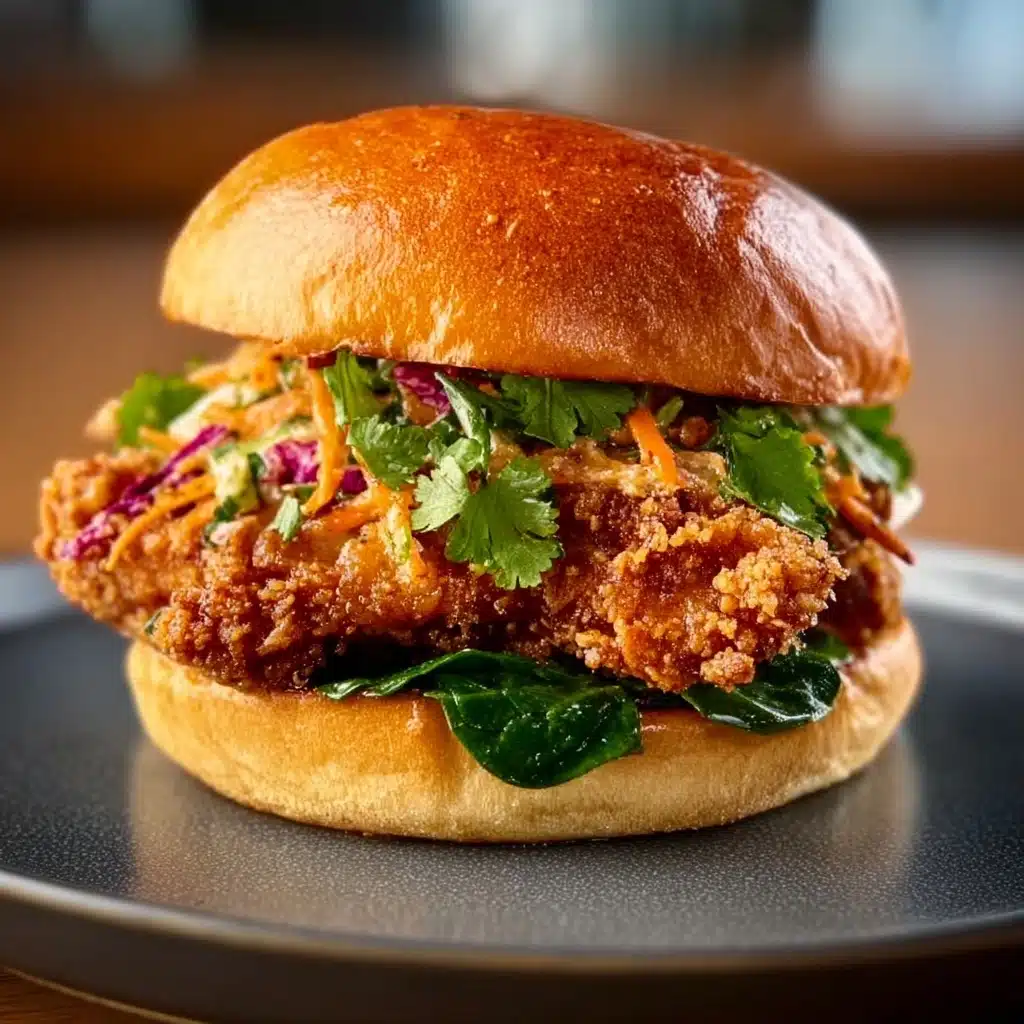
Thai Fried Chicken Sandwich
If you are craving a sandwich that packs a punch of exotic, vibrant flavors with a crispy, juicy twist, the Thai Fried Chicken Sandwich is an absolute must-try. This delightful creation brings together succulent marinated chicken thighs, perfectly fried to golden crispiness, and layered with fresh, bright toppings and a spicy, creamy chili mayo. Each bite offers a harmonious dance of textures and tastes that transport you to the bustling streets of Thailand, all nestled snugly between soft, toasted buns. It’s more than a sandwich; it’s a flavor adventure that’s surprisingly simple to make at home, guaranteed to become one of your favorite go-to meals.
Ingredients You’ll Need
Getting ready to make this Thai Fried Chicken Sandwich is a joy because it uses straightforward ingredients that each play a critical role in building flavor and texture. From the rich coconut milk that tenderizes the chicken to the punchy curry powder and fresh herbs that add layers of aroma and brightness, every element combines to make this dish unforgettable.
- Chicken thighs (4 boneless, skinless): These provide juicy, tender meat perfect for frying and absorbing bold flavors.
- Coconut milk (1 cup): Adds creaminess while tenderizing the chicken, lending subtle tropical notes.
- Curry powder (1 tablespoon): Offers warm, complex spices essential to that signature Thai flavor.
- Garlic (3 cloves, minced): Delivers sharp, aromatic pungency that awakens the palate.
- Fresh ginger (1 tablespoon, grated): Brings bright, citrusy zing, balancing the richness.
- Salt (1 teaspoon) and sugar (1/2 teaspoon): Enhance natural flavors and provide balance.
- Rice flour or cornstarch (1 cup): Critical for creating a light, ultra-crispy crust.
- Salt and pepper (to taste): Season the coating for a perfectly balanced crunch.
- Vegetable oil (about 3 cups): Needed for deep frying to achieve that irresistible crisp texture.
- Thai chili sauce (1/4 cup): The star ingredient in the spicy mayo, bringing a flavorful heat.
- Mayonnaise or plain yogurt (1/4 cup): Adds creaminess and cools the spice in the sauce.
- Cucumber (1/2, thinly sliced): Offers a crisp, refreshing contrast.
- Pickled carrots (1/2 cup, thinly sliced): Bring vibrant color and tanginess.
- Fresh cilantro leaves: Add herbal brightness and essential freshness.
- Fresh Thai basil leaves: Impart a sweet, anise-like fragrance that elevates the sandwich.
- Soft buns or brioche buns (4, lightly toasted): Their pillowy texture holds everything together perfectly.
How to Make Thai Fried Chicken Sandwich
Step 1: Marinate the Chicken
Begin by creating a flavorful marinade that infuses every bite of your chicken thighs with tender, aromatic goodness. Mix coconut milk, curry powder, minced garlic, grated ginger, salt, and sugar in a bowl until everything blends smoothly. Add the chicken thighs, coating them thoroughly, cover, and refrigerate for at least 1 hour or even overnight. This step ensures your chicken will be juicy and bursting with those classic Thai spices.
Step 2: Prepare the Breading
Next, prepare your crisp coating by mixing rice flour or cornstarch with salt and pepper on a plate. When you remove the chicken from the marinade, allow any excess liquid to drip off gently. This prevents sogginess. Thoroughly dredge each piece in the dry mixture, pressing slightly so the coating adheres evenly, which guarantees a golden, crunchy crust upon frying.
Step 3: Fry the Chicken
Heat vegetable oil in a deep skillet or fryer until it reaches 350°F (175°C). Carefully lower your coated chicken pieces into the hot oil, frying for about 5-7 minutes per side. You’ll know they’re ready when they’re gorgeously golden brown and the internal temperature hits 165°F (74°C). Remove them with care and place on a wire rack or paper towels to drain excess oil, preserving their crispness.
Step 4: Prepare the Sauce and Toppings
While the chicken fries, whip up the signature spicy mayo by whisking together Thai chili sauce and mayonnaise or yogurt until creamy and evenly blended. Slice the cucumber and pickled carrots into thin strips for a cool, tangy crunch that contrasts perfectly with the heat. Rinse and dry fresh cilantro and Thai basil leaves. Lightly toast your buns for added texture and warmth — this simple step truly amplifies the final sandwich experience.
Step 5: Assemble the Thai Fried Chicken Sandwich
Now comes the fun part. Spread the chili mayo generously on both halves of each toasted bun, creating a luscious, flavorful base. Layer on the crispy fried chicken, followed by cucumber slices, pickled carrots, and fresh herbs, creating a beautiful medley of colors and flavors. Top with the other bun half and press gently to secure your masterpiece.
How to Serve Thai Fried Chicken Sandwich
Garnishes
Fresh herbs like cilantro and Thai basil are key to garnish your Thai Fried Chicken Sandwich. Their bright, aromatic qualities lift the whole dish, adding a refreshing finish that balances the richness of fried chicken and spicy mayo. A small squeeze of lime or extra chili sauce on the side can also create a fun, interactive flavor boost at the table.
Side Dishes
Pair your sandwich with light and zesty sides such as a crisp Asian slaw, jasmine rice, or even sweet potato fries for a delightful textural contrast. Simple cucumber salad or pickled vegetables also work wonderfully, echoing the tang and crunch inside the sandwich itself so each bite feels fresh and exciting.
Creative Ways to Present
If you’re hosting a casual get-together, present the sandwiches open-faced with abundant herbs and veggies piled high for a dramatic, inviting look. Alternatively, serve mini sliders for a crowd-pleasing appetizer. Wrapping the sandwich in parchment paper gives a street-food vibe while making it easy to hold and eat — perfect for picnic or casual lunches.
Make Ahead and Storage
Storing Leftovers
If you have leftovers, keep the fried chicken separately in an airtight container in the refrigerator for up to 3 days. Store buns and toppings separately to maintain freshness and prevent sogginess, so your Thai Fried Chicken Sandwich always tastes crisp and vibrant when you’re ready to reassemble.
Freezing
While it’s best to enjoy this sandwich fresh, you can freeze cooked, breaded chicken thighs wrapped tightly in plastic wrap and foil for up to 1 month. When ready to eat, thaw overnight in the fridge before reheating to help maintain juiciness and crisp texture.
Reheating
To revive the delicious crunch of your leftover chicken, reheat it in a preheated oven at 375°F (190°C) on a wire rack for about 10-12 minutes. This prevents sogginess that microwaving might cause. Toast your buns fresh and add crisp toppings when serving for the best experience.
FAQs
Can I use chicken breasts instead of thighs?
Absolutely! While chicken thighs are juicier and more forgiving during frying, chicken breasts can be used if you prefer leaner meat. Consider pounding them to even thickness for even cooking and marinate them longer to retain moisture.
What if I can’t find Thai chili sauce?
If Thai chili sauce isn’t available, you can substitute with sriracha or a sweet chili sauce. Just adjust the quantity to suit your heat preference. Mixing a little honey can help mimic the sweet-spicy balance of authentic sauces.
Is there a gluten-free option for this sandwich?
Yes! Using rice flour for breading keeps the coating naturally gluten-free. Just be sure your buns or bread are gluten-free as well. The rest of the ingredients are naturally free from gluten, making this sandwich easy to adapt.
Can I bake the chicken instead of frying?
Though deep frying yields the crispiest texture, baking is an option for a healthier twist. Bake at 425°F (220°C) on a wire rack over a baking sheet for about 25-30 minutes, flipping halfway through, until golden and cooked through.
How spicy is the Thai Fried Chicken Sandwich?
The sandwich has a nice medium heat from the Thai chili sauce combined with cooling mayonnaise or yogurt. You can always adjust the spice level by adding more or less chili sauce or opting for milder toppings if preferred.
Final Thoughts
Making a Thai Fried Chicken Sandwich at home is not just about creating a delicious meal; it’s about celebrating bold, vibrant flavors that are sure to delight your taste buds with every bite. With its crispy chicken, aromatic herbs, and irresistible spicy mayo, this sandwich is a showstopper for any occasion. I can’t wait for you to try it and experience firsthand why it’s become such a beloved favorite in my kitchen. Enjoy the adventure of bold flavors and crispy perfection!
PrintThai Fried Chicken Sandwich

A flavorful Thai Fried Chicken Sandwich featuring marinated, crispy chicken thighs coated in curry-spiced batter, topped with a spicy Thai chili mayo, fresh cucumber slices, pickled carrots, and aromatic herbs, served on soft toasted buns.
- Prep Time: 15 minutes
- Cook Time: 15 minutes
- Total Time: 1 hour 30 minutes (including marination)
- Yield: 4 sandwiches 1x
- Category: Sandwich
- Method: Frying
- Cuisine: Thai
- Diet: Halal
Ingredients
For the Chicken Marinade
- 4 boneless, skinless chicken thighs
- 1 cup coconut milk
- 1 tablespoon curry powder
- 3 cloves garlic, minced
- 1 tablespoon fresh ginger, grated
- 1 teaspoon salt
- 1/2 teaspoon sugar
For Breading
- 1 cup rice flour or cornstarch
- Salt and pepper, to taste
For Frying
- Vegetable oil, for frying (enough to deep fry, about 3 cups)
For Sauce and Toppings
- 1/4 cup Thai chili sauce
- 1/4 cup mayonnaise or plain yogurt
- 1/2 cucumber, thinly sliced
- 1/2 cup pickled carrots, thinly sliced
- Fresh cilantro leaves
- Fresh Thai basil leaves
- 4 soft buns or brioche buns, lightly toasted
Instructions
- Marinate the Chicken: Combine coconut milk, curry powder, minced garlic, grated ginger, salt, and sugar in a bowl. Add the chicken thighs and coat thoroughly. Cover and marinate for at least 1 hour or up to overnight in the refrigerator for maximum flavor and tenderness.
- Prepare the Breading: Mix rice flour or cornstarch with salt and pepper on a plate. Remove the chicken from the marinade, letting excess drip off. Dredge each piece thoroughly in the dry mixture, pressing lightly so the coating sticks evenly.
- Fry the Chicken: Heat enough vegetable oil in a deep skillet or fryer to 350°F (175°C). Carefully place the coated chicken thighs into the hot oil. Fry for 5-7 minutes per side until golden brown and the internal temperature reaches 165°F (74°C). Remove and drain on a wire rack or paper towels.
- Prepare the Sauce and Toppings: Whisk together Thai chili sauce and mayonnaise or yogurt until creamy and spicy. Slice cucumbers and pickled carrots thinly. Wash and dry fresh herbs. Lightly toast the buns for texture and warmth.
- Assemble the Sandwich: Spread the chili mayo on both halves of each toasted bun. Layer with crispy fried chicken, cucumber slices, pickled carrots, and fresh herbs. Top with the other bun half and gently press to secure.
Notes
- For extra crispiness, double dredge the chicken by dipping again in the marinade and dry mixture before frying.
- Substitute mayonnaise with plain yogurt for a lighter sauce option.
- Adjust the level of Thai chili sauce based on your preferred spice tolerance.
- Pickled carrots can be prepared in advance to save time.
- Ensure oil temperature is consistent to avoid greasy chicken.
- Use brioche buns for a richer flavor or soft sandwich buns for a lighter option.
Nutrition
- Serving Size: 1 sandwich
- Calories: 520 kcal
- Sugar: 5 g
- Sodium: 850 mg
- Fat: 30 g
- Saturated Fat: 12 g
- Unsaturated Fat: 15 g
- Trans Fat: 0.2 g
- Carbohydrates: 45 g
- Fiber: 3 g
- Protein: 25 g
- Cholesterol: 110 mg
Keywords: Thai fried chicken sandwich, spicy chicken sandwich, curry fried chicken, Thai sandwich, crispy chicken sandwich, Thai chili sauce sandwich